

I am so excited to be able to share with you this recipe for my gluten free vegan sugar “cut-out” cookies. When I first began my journey I struggled with not having many of the common things to eat around my house. And with kids, this almost always means cookies.
Walking through the grocery store during holiday time, often means walking past all of their beautifully decorated cookies that we can’t eat. So I know first hand how life changing having the right gluten free cookie recipe can be.
Pin it here>
Have you struggled with finding a successful cookie recipe that is easy to make and also tastes good?
I recently posted a recipe for the one I bake the most that calls for Andrea’s gluten free flour. But since her flour has limited availability, I have been determined to give you a recipe that was not dependent on any one brand of flour. To get my previous recipe click here.
I know that just figuring out how to navigate this diet can be a struggle. I don’t want you to also struggle with finding the right ingredients for these amazing cookies. The brands I used are below, but these flours are also available at most grocery stores by Bob Red Mill.
My ingredients
I wanted this cookie to be as close to the original cookie I posted as possible so I looked at the ingredients on the package of Andrea’s flour. Her flour consists of four ingredients brown rice flour, potato starch, tapioca starch and xanthan gum. So I knew this cookie was going to have these four ingredients in some kind of combination.
I have done a little bit of research regarding mixing my own gluten free flour blend, and there are many different options for proportions. You will see the exact measurements in the recipe provided below. I don’t want to bore you with the details.
When it comes to single grain flours, I really love Authentic Foods brand which is available on Amazon. These flours are produced in an allergen free facility and I really love the fine grind. They also offer 2 types of gluten free all purpose flours. I have tried the classic blend. If you try it, don’t forget to add xanthan gum as it is not already included.
You will always see 4 Authentic Foods products in my pantry. Brown rice flour, white rice flour, sorghum, and potato starch. These are the ingredients I use the most when I bake.
As for the tapioca starch, I came across a recipe once that recommended the use of Gluten Free You and Me Expandex Modified Tapioca Starch. Once I tried it I was hooked. I love how it brings everything together. This is another one of my staple pantry items.
As I mentioned before, the ingredients in this recipe are not specific to any particular brand. Just because I love Authentic Foods and Expandex, doesn’t mean you have to use these brands. I have also had great results with many Bob Red Mill brand flours. However, if you are able to use the exact brands I use, you do have a better chance of getting exact results.
My method
Recently I posted about why I bake gluten free and mostly vegan. Please don’t be intimidated by this. I have 2 looks over my shoulder to show you everything step by step. One will show you how to make a flax egg and one I will show you how I mix the shortening into my dry mix. I have tried using vegan butter to make these cookies, but it makes my dough way to sticky and they do not come together well.
As a child my mom and nonna used to always use shortening in their cookie recipes and that really helps these cookies hold together beautifully. I also always mix my shortening into my dry mix which is another difference in my method.
Traditionally the butter and sugar gets mixed together first and I have found that it made my gluten free cookies too cake-like. Sifting the shortening into your dry mix will give your cookies just the right amount of light weight crispness.
Take another “Look over my shoulder” to see how I do this method. In addition, I go over two different options for shortening.
My side notes
A I mentioned in the video, I suspect there has been a change in the spectrum shortening. I use this in many of my day to day recipes and they have recently redesigned their packaging. Something seems to be different with the actual product as well, as most of my baked goods are more moist that usual. If you find this to be the case, you can decrease the amount of milk and/or try these cookies with Nutiva brand shortening. If your dough is dry, will need to add more rice milk 1 teaspoon at a time.
The rest of the ingredients are pretty self explanatory. This recipe usually takes about 20 minutes to mix, and you are done.
Also, you will need to refrigerate the dough for 30 minutes before you can cut out the cookies. If you need to leave the dough in for longer than 30 it is ok, but you may not be able to cut out the shapes right away. You will need to let the dough get acclimated again if it is in the refrigerator longer. You don’t want it to sit out too long though because that will negate chilling the dough.
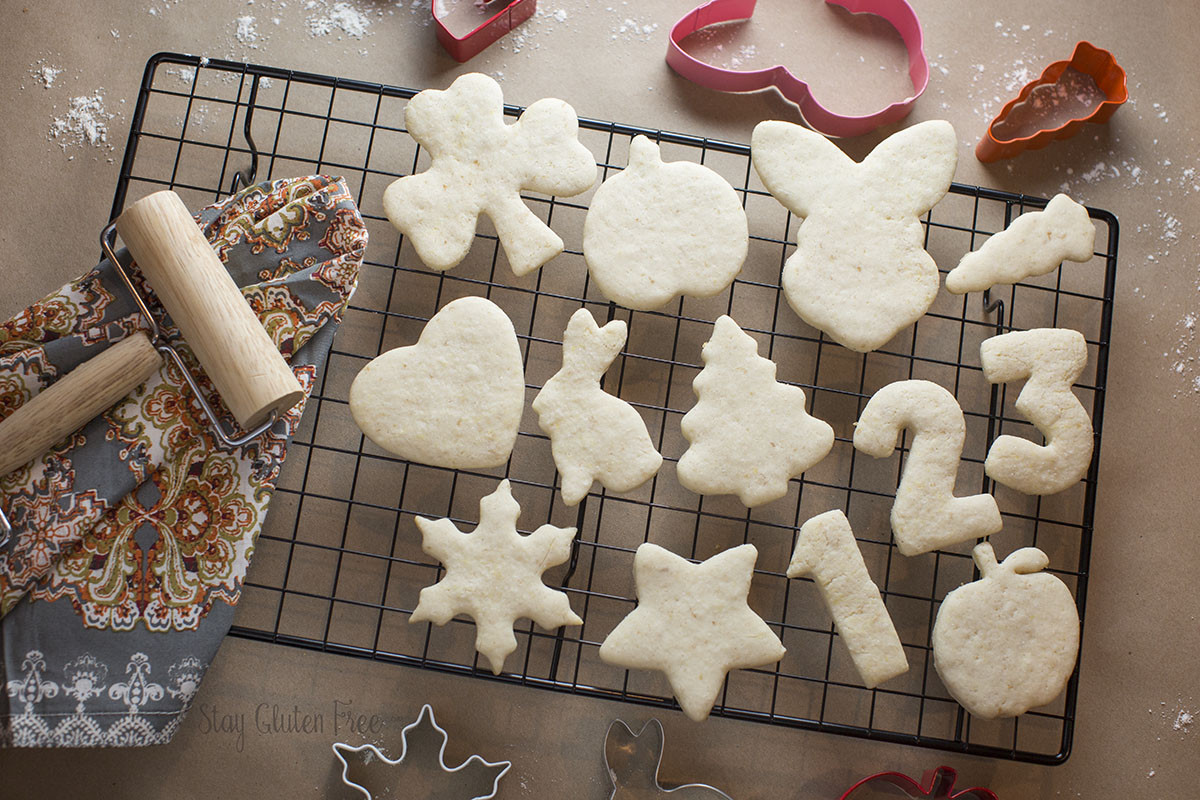
Place the dough in between 2 pieces of parchment paper to roll it out. I bought this Norpro Wood Pastry/Pizza Roller and I absolutely love it. I can hold my parchment paper with one hand and roll with the other.
Next, place the filled cookie sheet in the freezer for 7 minutes just before baking. This is the true trick to your cookies keeping their shape. Set a timer, it needs to be exactly 7 minutes.
My mommy saving tip
And because I know you are so busy raising and loving on your kids, here is your mommy saving tip. Often times I will mix my dough, divide it and freeze it so that I can make just a few cookies at a time. This allows my family to have fresh baked cookies more often without doing all the work every time.
When you are ready to bake cookies, just thaw the dough for about an hour. The amount of time will vary, but you will be able to feel the dough to see when it will be ready to use. The middle of the dough ball usually takes the longest to defrost. It is likely that you will need just a dusting of the brown rice flour to collect any extra moisture from freezing.
You will still need to do the 7 minute freeze just before baking.
These cookies are meant to be served and shared with icing. Look for my gluten free vegan royal icing recipe next week.
Now when my oldest son and I walk through the bakery at the grocery store, our conversation is slightly different. Instead of saying “we can’t eat those gorgeous cookies”, we now say “We can make those gorgeous cookies”.
I hope you and your family love these cookies as much as we do. Let me know how they turn out!
Do you have a favorite cookie you would like to bake gluten free? Leave a comment below.

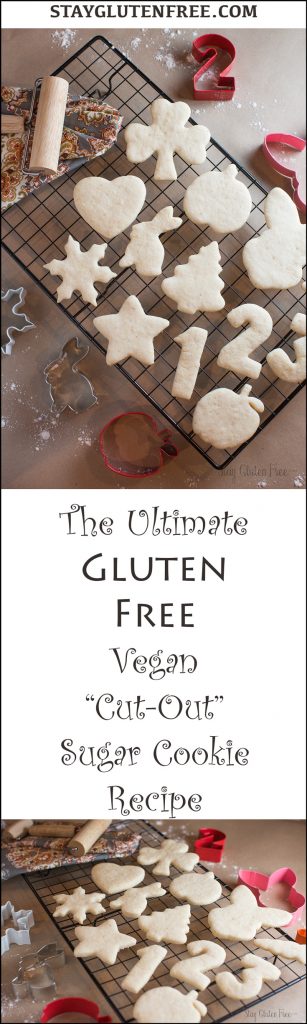
Gluten Free Vegan Sugar Cookie
Ingredients
- 1 tbsp golden flax meal To be used to make flax egg
- 3 tbsp Warm water To be used to make flax egg
- 1 1/2 cup Brown rice flour plus more for dusting
- 3/4 cup Potato starch
- 3/4 cup Tapioca starch
- 1 cup Granulated sugar
- 3 tsp baking powder
- 1 tsp Xanthan gum
- 1/2 tsp salt
- 1 cup Shortening
- 1/2 cup Unsweetened rice milk
- 1 tbsp Unsweetened rice milk add this slowly as you mix. You may not need the whole amount
- 2 tsp Vanilla extract
- 1 tsp Lemon extract
Instructions
- In small bowl combine the golden flax meal and warm water to make the flax egg. Set aside for 10-15 minutes.
- Preheat oven to 350 and line cookie sheets with parchment paper
- In a large bowl mix brown rice flour, potato starch, tapioca starch, sugar, baking powder, xanthan gum, and salt.
- Sift in the shortening until it is completely mixed into the dry ingredients.
- Add only 1 cup of rice milk, the flax egg, vanilla and lemon and begin forming the cookie dough.
- If the dough seems dry and is not forming well, begin adding rice milk, one teaspoon at a time. Your dough should begin to form. Do not add too much rice milk as your dough cold become too wet.
- Form a dough ball and refrigerate in a covered bowl for 30 minutes
- Dust work surface with a small amount of brown rice flour. Place a small amount of dough in between two pieces of parchment paper and roll dough out. Cut shape, repeat.
- Once cookies are cut, place filled cookie sheet in freezer for 7 minutes just before baking.
- Bake 11-13 minutes. Check the bottoms for just an outline of color. Do not over bake.
- Cool cookies completely before applying the icing.
- Serve and Enjoy!