


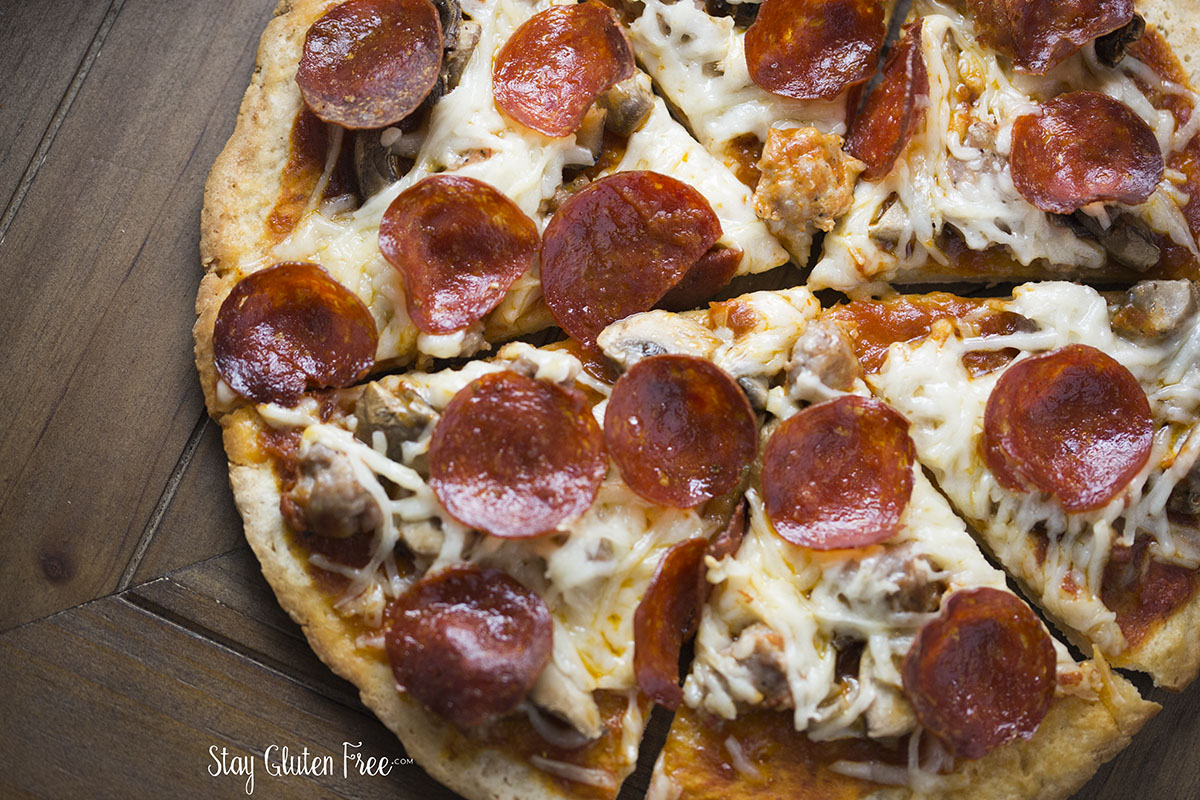
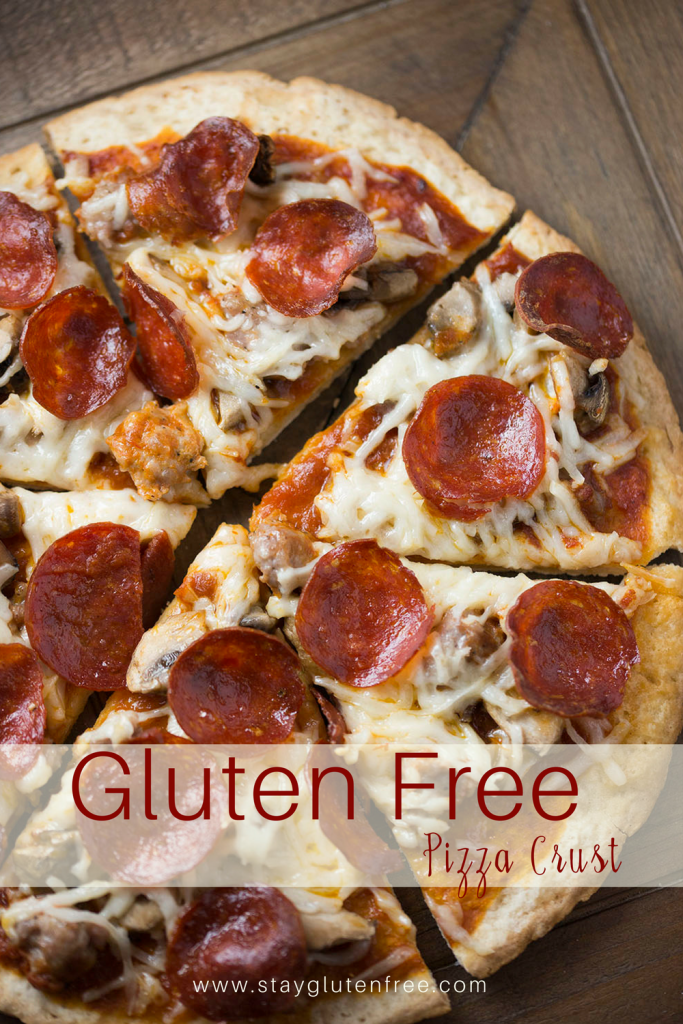
The thing I absolutely miss the most about living gluten free is pizza! I could live without all of the rest of the food, but pizza is just something I can’t live without. I spent my entire childhood in my dad’s pizzeria and I grew up eating pizza almost daily (yikes!). It has now been my mission to create the most amazing gluten free pizza crust.
I love a crispy crust, but not hard that I might break a tooth. If you have sampled gluten free pizza crusts you definitely know what I mean, right? It also needs to be soft with each bite, but not doughy like a deep dish.
I also don’t want the crust to take over the pizza. My husband described it best, he said, “I like to taste the toppings. I don’t really want to notice the crust. The crust should just compliment the pizza.”
I have tried to create a pizza crust in the past, but I would get frustrated and give up. I have bought and tried so many crusts as well. For a long time my boys liked the Namaste gluten free pizza crust. But I think they have grown tired of it. We have also tried Enjoy life, Luce’s Flat bread, Think Eat Live sunflour crust and so many more.
Ready-made crusts like Udi’s are also tolerable choices, but they lack the feeling of having a true traditional make your own pizza night.
So recently I decided to try it again. We have been eating pizza for almost a month, and I think I have it. My very own gluten free pizza crust and I couldn’t be happier. So let’s get to it.
My Ingredients
Not all gluten free flours are the same. Can I get an amen? If you are going to try to make my gluten free pizza crust using Bob’s Red Mill brown rice flour you will find that you will have to decrease the water (add only 3/4 cup warm water to yeast) and you might need a little less than 1 tbsp at the end if you feel like the dough is dry. If you use the whole tbsp you might do a light dusting with more brown rice flour.
I did a side by side comparison of my recipe using Authentic Foods brand (my preferred brand) and Bob’s Red Mill. If you look at these flours side by side you will notice that the Bob’s is so much more sandy in texture. This is probably why you need less water.
I’m so glad to have done this side by side comparison because it really helps me help you have success with my recipes.
I also experimented another way. I wanted to add some options because people on a gluten free diet generally have other sensitivities and can’t handle gums. Since I learned about psyllium husk, an ingredient commonly used in gluten free bread, I had to at least give it a try as a substitute for xanthan gum.
When I used psyllium husk, I noticed my crust was crunchier and it had a nice color. The color I loved, the crunch was a little too much. When I used xanthan gum, I really loved my results. But, since I’ve already done the testing, if you cannot have xanthan you can substitute it with 1 tbsp of psyllium husk. If you use this substitution you will need to use the full cup of warm water, do not leave out the tablespoon.
I also learned a little bit more about yeast while I was doing all of this testing. Red Star makes two different kinds of yeast. They make Active Dry Yeast and Quick Rise. When I started I was using the Active Dry Yeast, my crust didn’t rise and it was harder than I wanted. But I continued to give it chances.
Then one day at the grocery store, I happen to stumble upon Fleishmann’s Gluten Free Pizza Crust yeast. Have you used this before? I am not kidding, this was THE BEST crust I ever made. This yeast does not require rise time but neither does gluten free dough because it often doesn’t really rise well anyway.
The important thing to know about gluten free dough is that you do not let it rise and then shape it, it is exactly opposite. You need to shape the gluten free dough and then let it rest and rise. A thirty minute to an hour rise time just isn’t enough time for Active Dry Yeast and gluten free dough.
So in the middle of my testing I happened to be in the pizza aisle of the grocery store and I saw Fleishmann’s Pizza Crust Yeast. I was intrigued and also thrilled to see the gluten free label. When I looked at the ingredients I noticed it had enzymes and sorbitan monostearate.
Since I wasn’t sure how readily available this yeast would be I am happy to say that when I looked on the back of the Red Star Quick Rise Yeast it had the same ingredient as the Pizza Crust Yeast. I think the point here is that it lessens the rise time and actually gives the gluten free dough it’s best chance to get a little rise. But it still isn’t very much.
My Method
This is not your traditional rolling pin, toss in the air pizza dough. I wish it was. That is the pizza dough I grew up with. I have not been able to do this with any gluten free pizza dough yet.
When I first tried to make gluten free pizza, I was shocked to learn that most of the the gluten free pizza doughs were batter-like. Some of these batters worked out ok, but they left me really wanting a crust like the crust I grew up with. A crust that would give us a pizza the entire family could enjoy.
Once you equally divide the dough into 2 balls (for 2 pizzas), roll them up each individually. Take one of your dough balls and start pinching the edges. The middle will kind become the thicker part. You should have clean dry hands and if the dough seems a bit sticky, dust a bit of brown rice flour on your fingertips.
Place the dough on the prepared pizza pan and begin pushing down the middle with your fingertips. You will continue to do this pushing the thickness out toward the edges, repeat moving from the center out. Use your left hand to form the dough edges. Take a “look over my shoulder” and I will show you exactly how to do this. It is super easy I promise.
Next let the dough rest for 30 minutes to an hour. Then par-bake it for 10 minutes. Once you remove it from the oven flip the crust over and cover it with your desired toppings. Bake the pizza for another 10-12 minutes or until desired crispness is achieved.
Click here for a “look over my shoulder” now
I want to hear from you when you make this crust. Please leave me a comment and share this recipe with others. I have been so excited to share this with you and my Stay Gluten Free Community (it’s FREE to join, click here).
Be sure and save your leftovers. This pizza crust is great warmed up the next day in the oven. I don’t use my microwave anymore so I wasn’t able to test that. And if you are not in the mood to make two pizzas, you can always make just one big one, or refrigerate one dough ball for later use. To do this, be sure it isn’t in the refrigerator longer than 3 days and dust your fingers with some brown rice flour before shaping the dough.
Now that I have a baseline, I am sure I will experiment with different flours as well. I know there is a lot of rice intolerance out there, and I would love to help. Unfortunately, rice flour is a sure thing when it comes to most all-purpose gluten free flours that are really good. In this recipe I love the addition of sorghum for some added benefit.
As always, thank you for sharing your gluten free journey with me. Until next time!
The post Gluten Free Pizza Crust appeared first here on Stayglutenfree.com.
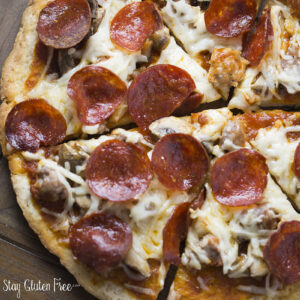
Gluten Free Pizza Crust
Ingredients
- 1/2 Cup Brown rice flour Plus a little more for dusting
- 1/2 Cup Sorghum flour
- 1/2 Cup Potato starch
- 1/2 Cup Arrowroot
- 1 1/2 tsp Xanthan gum
- 1 tsp baking powder
- 1 tsp salt
- 2 tbsp Sugar- divided
- 1 tbsp Honey
- 1 tbsp olive oil
- 1 pkg Yeast Fleishmann's Pizza Crust Yeast
- 3/4 Cup Warm water + a little extra
Instructions
- In medium size bowl add brown rice flour, sorghum, potato starch, arrowroot, xanthan gum, baking powder, salt and 1 tbsp of sugar. Whisk and set aside.
- In small bowl add the yeast, remaining tablespoon of sugar and warm water. Stir and let sit for 10 minutes. A foam will form.
- Once the 10 minutes have passed add the honey and olive oil to the dry mix.
- Next add the yeast
- Begin forming the dough with your hands
- Once the dough is formed it might feel a little sticky or you may need a tad bit more water. If it's sticky, wash and dry your hands and dust your finger tips with a little bit of brown rice flour. If it's dry add more water 1 tbsp at a time until a dough formed.
- Roll dough in two balls.
- Take one pizza dough place it on the pizza tray and push down in the middle and begin to flatten from the middle to the edges. Shape into a circle.
- Let the dough rest and rise for 30 minutes to an hour.
- Preheat oven to 425 degrees and lightly grease 2 pizza trays with a little bit of olive oil, wipe with a paper towel.
- Par-bake for 10 minutes.
- Remove from oven and flip it over. Place toppings on pizza and bake for another 10-12 minutes or until desired crispness is achieved.
- Cut, serve and enjoy!